![]() Classifieds
Classifieds
 |
This section allows your website visitors to
post ads for various things (ie: wanted jobs, lost & found,
announcements, items for sale, anything!). This is a good way to keep
visitors coming back again and again. As we all know, classifieds
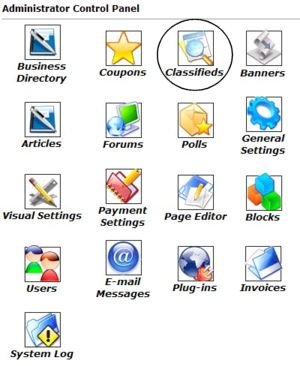
advertising in local newspapers is not getting any cheaper! In order to access and edit your Classifieds module, you will want to login to your Control Panel using your administration username and password. Click on the icon that is circled in this image (Classifieds). This includes setting pricing, approving or denying ads, editing current ads, and creating new ad categories. Once you have clicked the icon circled, you will see a menu similar to the one below...
|
Classifieds Menu

![]() Home
Home
This link brings you back to the Control
Panel home.
![]() Settings
Settings
This is where you will set up your
classifieds options, prices and add any custom text either above of
below the categories listing.
General Settings
| Action for pre-paid classifieds: | |
| Allow users to edit their ads: | |
| Ads may be listed in up to: | categories |
As you can see from the options above, and their drop down bars, you have the ability to set whether or not ads will be automatically added to your classifieds section, or if you want to review and approve each ad first.
Note: If you prefer to screen all classified listings for
appropriateness prior to activation, you should set 'Action for pre-paid
listings' to 'Hold for administrator approval'. Also note that if you enable the
'Allow users to edit listings' feature, your users will be able to completely
change the classified details after you approve it. This may defeat the purpose
of holding the classified for approval. But will save you the headache of updating an
ad each time they notice a typo or need a small adjustment.
![]() Click the
Update Settings button after setting preferences.
Click the
Update Settings button after setting preferences.
Prices (per week)
| :: Basic classified ad: | This sets your price for a basic ad without any of the additional options below. If you wish it to be Free to list a basic ad, keep this number set to 0.00. |
| :: Bold upgrade: | This will allow the Classified Ad to be Bold in the classifieds listings to help this ad stand out from among his fellow advertisers. |
| :: Highlight upgrade included: | This will allow the Classified Ad title to be a color the Advertiser selects upon registering to help his ad stand out from among his fellow advertisers. |
| :: Attention Grabber upgrade included: | This will allow advertisers to choose an image |
Our classifieds section only supports classified ad payments in a weekly form. No other payment options are supported. If you wish to ad others, it is up to you do. We do not provide help for this.
Content
This section will allow you, the admin, the ability to place a small amount of text either above or below the categories table on the Classifieds page. This is an option if you need additional space to provide instructions, or an announcement.
When you change the text above or below the categories you will see the following:
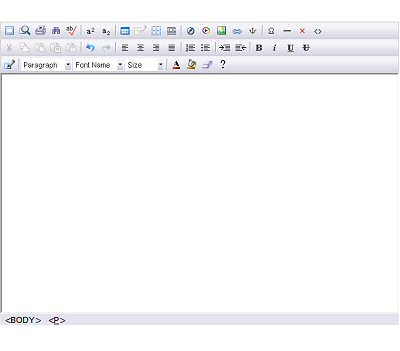
This is what your editor looks like. You can highlight and
delete the current text displaying there by clicking and holding down your right
mouse button and dragging it over the words Add your content here. And
then clicking the Backspace button on your keyboard. Now you are ready to create
your own text! Each of the buttons along the top tool bar will do something to
effect your page. Hovering your mouse over those options will give you a small
description of the buttons function. Such as the ![]() button will cause you text to be Bold. The
button will cause you text to be Bold. The ![]() will Italicize text, and the
will Italicize text, and the ![]() will underline text. I am not going to go over each and every button
function here, as I am sure your experimenting will show you how much control
and power you will have. Ok, now to create our Contact Page.
will underline text. I am not going to go over each and every button
function here, as I am sure your experimenting will show you how much control
and power you will have. Ok, now to create our Contact Page.
To create the above effects, I
used the Center Align ![]() button to center my text on the page, the font size drop down bar to change the
words Contact Us to a size 4(14pt). Then I used the Bold
button to center my text on the page, the font size drop down bar to change the
words Contact Us to a size 4(14pt). Then I used the Bold ![]() button. Next, I used the enter key to move to start a new paragraph. The typed
the second line of text. Then the enter key again and then the Font
Color
button. Next, I used the enter key to move to start a new paragraph. The typed
the second line of text. Then the enter key again and then the Font
Color ![]() button to change the font to green. Then enter again to move to the next line.
Finally, I typed in an email address for them to contact me at. Upon typing
either an email or an URL, it will automatically create a hyperlink for your
visitors to click.
button to change the font to green. Then enter again to move to the next line.
Finally, I typed in an email address for them to contact me at. Upon typing
either an email or an URL, it will automatically create a hyperlink for your
visitors to click.
*Java Script and html code found on other sites: Any html code copy and pasted from outside sources is considered outside content and will not be supported by our staff. There are simply too many codes and languages out there written by people who may or even may not have known what they were doing! Some of these codes may be poorly written, or may be coded in such a way as to not be supported by our editor. By placing 'code' from other sources in the editor may cause the following: Improper displaying of content when viewed in the browser, locking the Update Button after saving so no further changes can be made, distorting the page and payout of the page the content was added to, causing blocks to display in 'wrong' areas, causing blocks not to display at all. All of these effects are caused by the code entered into the editor, not of any fault with our software. If this issue occurs, the content will be deleted by our staff. I am sure you understand that it would too time consuming for our staff to try to find every instance of poor coding found from other sources on the Internet.
Ready to create your text??
![]() Click the Update Settings button after adding text or HTML.
Click the Update Settings button after adding text or HTML.
![]() Ads
Ads
Here you can edit any information
pertaining to a current classified listed in your classified section, or enable/disable a
ad awaiting your review. After selecting the above Ads icon,
you will see a list of all classifieds currently listed or awaiting approval. You can view the
Ad title, the classified description, the expiry date (this is the date that the
classified will be
deleted from your site, their current status (Awaiting Approval, Enabled, or Disabled),
and finally you are given the ability to Edit or Delete ![]() the classified.
the classified.
Clicking the Edit ![]() link allows you to access the Ad Details section to edit any current information,
or enable/disable the ad. At the bottom of the Ad
Details is a button to Update your changes.
link allows you to access the Ad Details section to edit any current information,
or enable/disable the ad. At the bottom of the Ad
Details is a button to Update your changes.
Clicking the Delete ![]() link will delete the ad from your site (this cannot be undone).
link will delete the ad from your site (this cannot be undone).
![]() Categories
Categories
Adding categories and subcategories to
your classifieds section is a snap! Or should I say 'click'?
 |
To the left, you can see a sample list of categories and
your option associated with them.
And to create a new category, simply type in the name of the new category into the field below the existing categories and click the Add button. |
To create a subcategory for any category, click the Category Name you wish to add to, not the Edit icon.
 |
And to create a new subcategory, simply type in the name of the new subcategory into the field below the existing categories and click the Add button. |
Clicking Return to Top will return you to the main categories list.
Note: You can create as many categories as you wish. Each
category can have as many subcategories as you wish. And each subcategory can
have as many sub-subcategories as you wish, and so on. You get the idea?
![]() Sample
Sample
Below is an example of how the classified
will display in your directory:
This image is a bit blurred due to the shrinking of this image for faster loading.
FAQ's
Q. Can I add text above (or below) the classifieds categories?
A. Yes. This is not done using the page editor, though. it is done in the Classifieds, General Settings. Please see the Chapter on Classifieds in the Guide for more information.Q. Do the classifieds expire automatically or do I need to manually delete them?
A. They will expire and delete themselves automatically.
Please visit the Knowledge Base in our Support Center for many other FAQs and their answers.
Close this browser window to return to the Guide. Or click to move on to the next section: Banners