|
|
Photo Polls |
|
|
Photo Polls |
The Photo Polls is an add-on feature you can choose to install to your site. It is a photo contest that your website visitors can participate in by uploading their photos and voting. The administrator can choose when the close date will be for each contests 'run'. The photo with the most votes at that time is automatically declared the winner and it added to the winners archives. Below we will explain the basics of managing your Photo Polls.
Setting Up Your Plugin
|
|
|
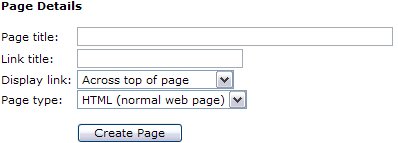
| After clicking your Page
Editor icon in your Admin Control Panel, you will need to
click the text link for a New Page. In this example, we are going
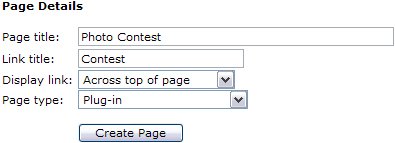
to set up the Photo Poll plug-in. In the Page title I have
inserted the page name. This title is also what will be displayed in
your navigation menus. In the Link title I have entered Contest.
Remember, this is the name file that will be created and must be one
word. Next
decide where you wish the link to display. And finally, since this is a Plug-in,
change the Page type from HTML, to Plug-in. Click the Create
Page button to continue.
Please do NOT use any HTML in this area! |
|
|
|
|
 |
To complete the activation of your new Plug-in,
you will need to change the Status from Hidden to Active.
Next you will need to change the Plug-in to display from the
default 'Business Directory' to the 'Photo Polls',
or whichever Plug-in you are actually installing.
See left example of changes. Finally select Update Page. After you have completed these steps, you can return to the Control Panel. You will now be able to see and select the Photo Polls icon in your Administrators menu to set up your first Contest!
|
| First you will probably want to edit your Introductory Text.
To do this, you will click the [Edit] link shown in the example to
the right. This should be an announcement of sorts letting your visitors
know if the current running contest has a theme, and when the close date
of the current contest will be. You may also wish to announce the winner
of the previous contests you may have run in this area. Or you could add a
Block to this page and highlight
past winners in individual blocks!
|
|
| PLEASE NOTE: The Introductory Text area
is not supported by our online editor to create your HTML code (like our Page Editor and Blocks Editor). If you wish to
make it "pretty", instead of plain text, you will need to know
HTML basics. HTML teaching or support is not included
in your membership. This is something you will need to learn on your own.
If you make a mistake, simply delete it and try again. Or opt to use plain
text in this area. Note: An alternative would be to use your Page
Editor or Blocks Editor to make the text as you would like it
to appear, then use the Toggle HTML tool After changing your Introductory Text, click the 'Update' button to continue. You will get a "Introductory text updated" message and will need to click "Return" to continue. |
|
| Now by clicking the link to the Photo Polls in your Navigation Menu, you will see the changes and the text that invites your visitors to submit their own photos [Submit a Photo], view current voting results [View Poll Results], or view winning photos from previous contests [View Past Winners]. |  |
|
|
Once a visitor has submitted a photo, you will receive an email letting you know a new photo is ready for review. You will need to login to your Administrator's Control Panel and select the Photos Poll icon.
If you wish to include the photo in the current contest, simply click the [Post for Voting] link. Otherwise, you can delete [Delete] it (this cannot be undone). Once you have approved it, it will display in the Current Active Photos section, along with any other photos you may have already approved. |
| To end a current contest, you need to click the 'Click here to begin a new poll' link in the Begin New Poll section. This will place the photo with the highest vote count into the winners archives, until you choose to permanently delete it. | |
FAQs
Please visit the Knowledge Base in our Support Center for many other FAQs and their answers.
Close this browser window to return to the Guide. Or click to move on to the next section: Refer a Friend Plug-in