|
Insert an Image |
|
Insert an Image |
This chapter will help you learn how to use the Insert an Image icon in your Page or Blocks Editor.
This is assuming you already are in the Page or Blocks Editor sections and see the WYSIWYG Editor as shown below.
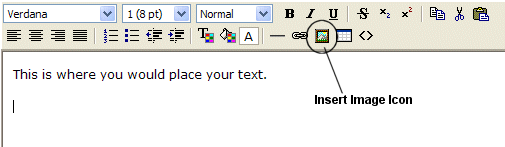
Once you have reached the area of your page or block where you wish to insert an image, click the icon circled above that looks like a framed picture of a mountain. This is the "Insert Image" icon. Clicking this icon will open a smaller popup box. If this box does NOT pop up, be certain that you do not have a Pop Up Blocker enabled on your computer, as it may be interfering with the browser.
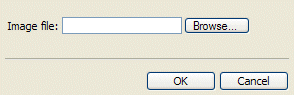
This box will look similar to the on picture above. The 'Image' field is a drop down box that will list all images that have currently been uploaded to your system. If you have not uploaded an image yet, you will probably not have any images listed here and a small red 'x' will display in the 'Image Preview' area (the white square area above the 'OK' and "Cancel' buttons.
Uploading Image to the Server:
First I will show you how to upload the image to get it to display in the drop down list. Click the Upload Image button in the bottom left corner. A smaller box will now pop up.
|
|
The image will need to be saved somewhere on your computer in order for you to upload it. You will click the browse button to browse your computer's hard drive for the image you wish to upload. |
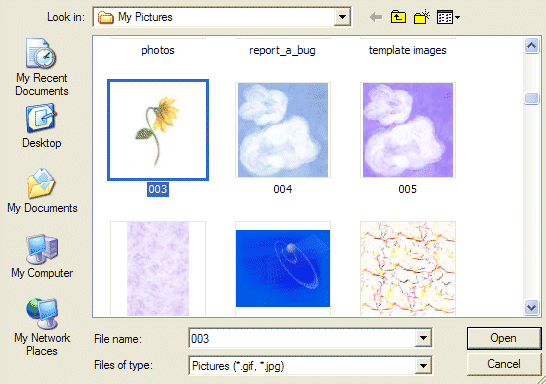
Once you have located the image file, click on it to select it. You will now see the name of that image file displayed in the 'File Name' field. Click the 'Open' button.
Ensure the image(s) you are attempting to upload is a valid image file. Valid image files include JPEG (.jpg), GIF (.gif), and PNG (.png) images. Other types of files such as PDF and PPT files are not images, and cannot be accepted. Simply renaming the file extension does not change the file formatting. It must be saved in a graphics program as the proper format. Also ensure that your image is not over 150kb in file size. If it is, it is considered much too large for browsers to load in a timely manner and should be resized to a smaller file size.
Also please keep in mind, file names (no matter
what type) should never have spaces in the name. File names should always be all
one word. You can substitute an underscore for a space if needed:
Good example: Business_Services.jpg
Bad example: Business Services.jpg
|
|
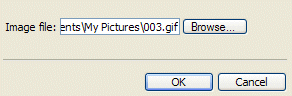
Now you will see the "path" to
that image listed in the 'Image File' field. Click the 'OK'
button.
|
| You should now see a message telling you the image was successfully received. If you did not get this image, be certain that the file you are trying to upload is a valid image file (.gif, .jpg, .png, .bmp). Clicking 'OK' will close this small box. | 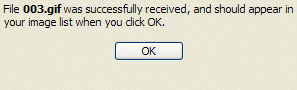
|
Inserting the image into your Page or Block:
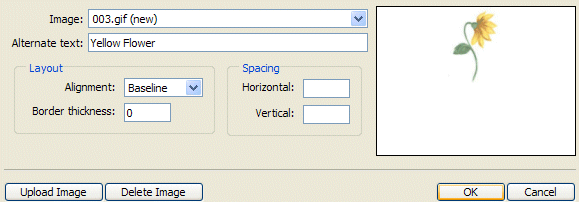
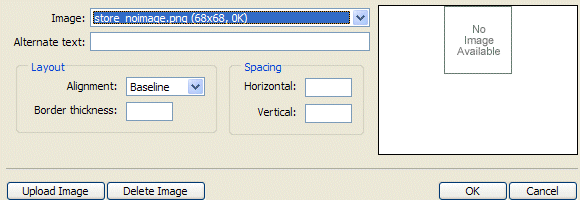
Now you can use the Image drop down bar to locate the name of the image you just uploaded (or an image you may have previously uploaded, as the case may be). Click on the proper file name of the image you want to inert into your page or block. Once you have clicked on the name you can see a preview of the image you have selected in the white box to the right of the browser window. In the above example, you can see the image of the yellow flower. You must type in an Alternate Text.
Q. What goes in the Alternate Text field when
trying to upload an image?
A. The alternate text field is where you can describe an image in the event it is not
viewable to a visitor. For example... they have a setting in their
browser set to not display images or perhaps they have a slow connection and the
browser 'times out' before the image loads. The alternate text will let them
know what 'should' have been there.
If you do not want the image to have a border around it, you can place a '0' in the 'Border Thickness' field. This is optional and all fields in this area can be left blank. When you are ready, click the 'OK' button.

You can now see the Image you have have uploaded and Inserted in the Editor. In the above example, I have my mouse hovered over the image and you can see how the "Alternate Text' displays.
Now you can continue editing your page or block as usual or insert another image if desired.
Close this browser window to return to the Guide.